
Earlier this summer I was browsing the web, looking for nick-nacks too fill my apartment with, when I stumbled across the cutest lemon filled lamp. Being that my room theme is grey with lemons, I couldn't contain my excitement as I clicked the image and waited for the price to pop up.
It was the perfect lamp! ...And it was going to be over $100.00 with shipping. Suddenly, not so perfect.
Luckily my crafty mom encouraged me to make one (and informed that such a thing as a "lamp kit" exists). So read on to learn about my much-loved lemon lamp and how I made it (for under $50.00!).
It was the perfect lamp! ...And it was going to be over $100.00 with shipping. Suddenly, not so perfect.
Luckily my crafty mom encouraged me to make one (and informed that such a thing as a "lamp kit" exists). So read on to learn about my much-loved lemon lamp and how I made it (for under $50.00!).
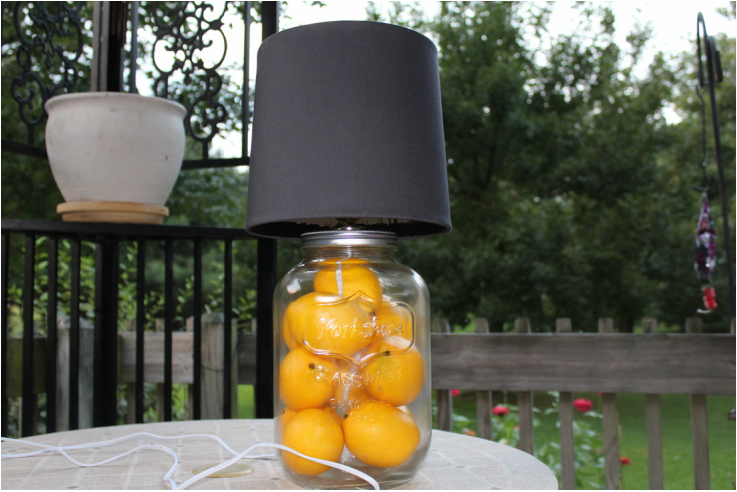
What You'll Need:
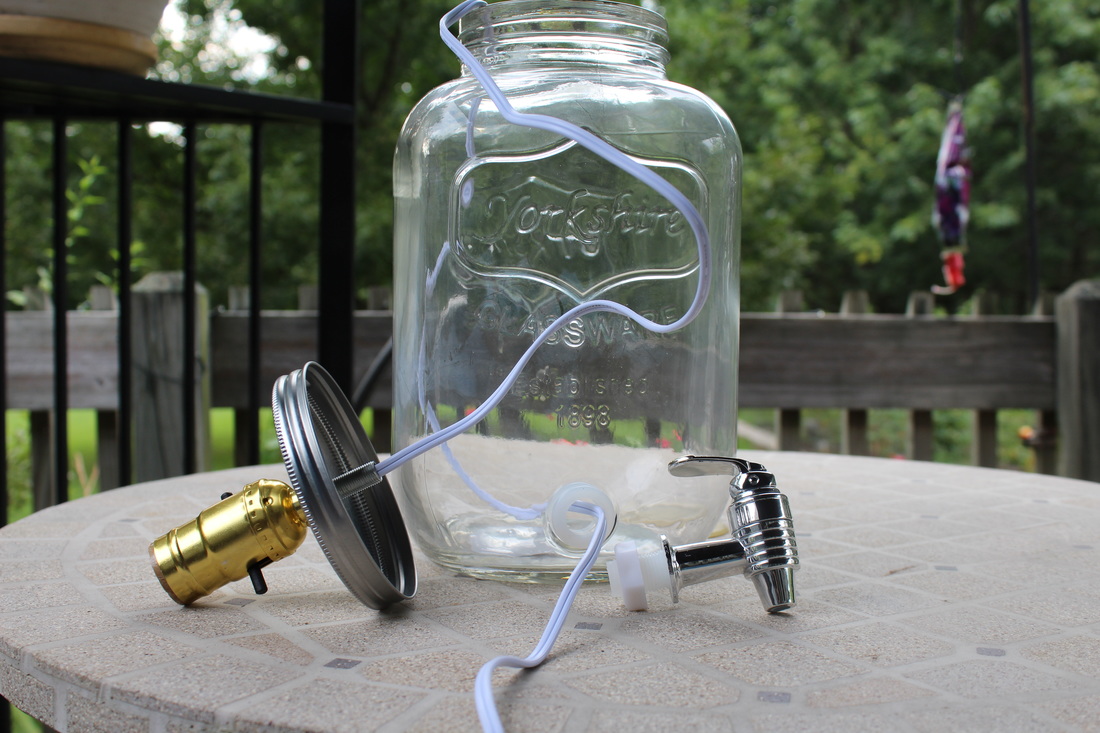
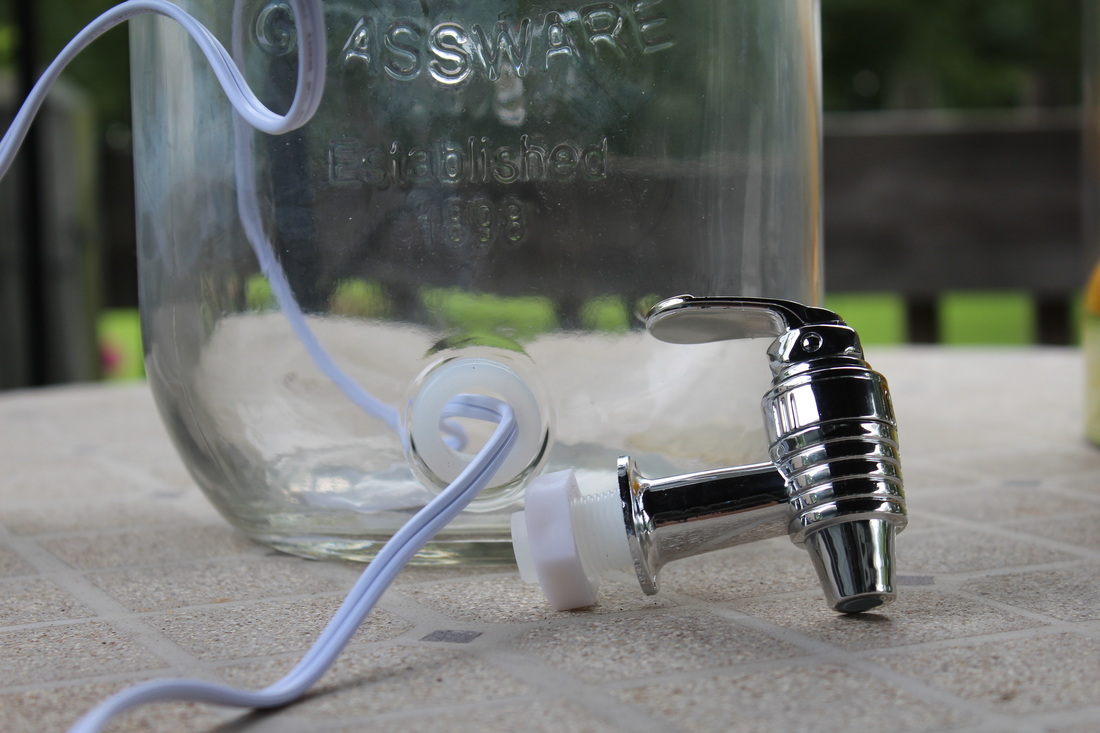
- A beverage dispenser. Make sure you get one that has a removable spout, otherwise you'll have to drill a hole through glass (which is impossible to do without shattering the jar, if you don't have the right drill) and a metal lid (if the lid is glass you will face the same issue of trying to drill through glass). I got my Yorkshire beverage dispenser at Homegoods, but I've also seen it sold at TJ Maxx and Burlington!
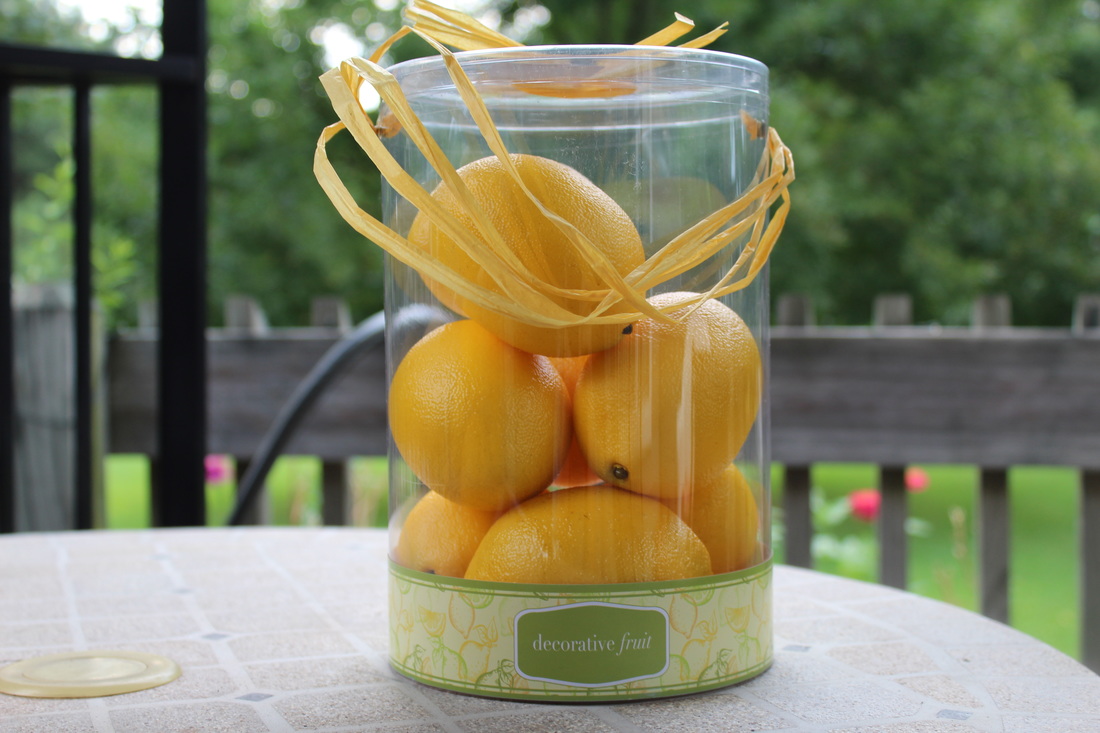
- Something to fill the body of the lamp with. In my case, I chose decorative lemons, that I bought at TJ Maxx, but you can use anything from flowers to beads to artificial fruit!
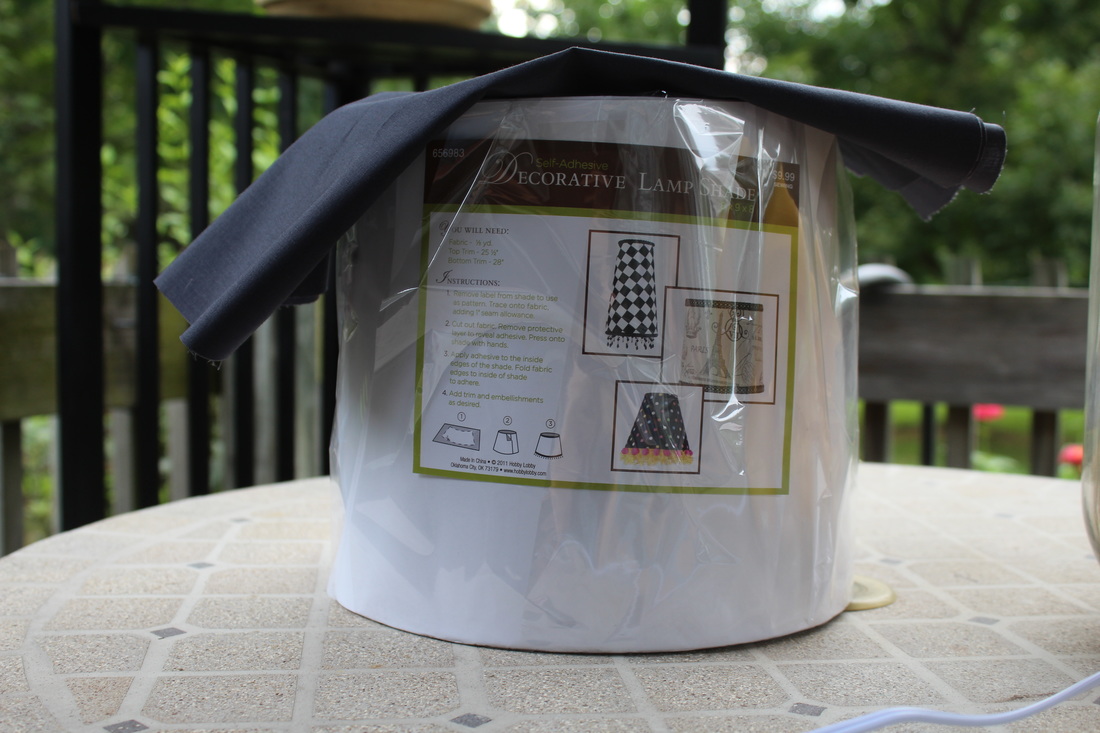
- A lampshade. If you find one thats the exact color you want at an affordable price, you're lucky. I bought a lampshade kit and fabric that was the color I wanted at Hobby Lobby!
- A Lamp Kit. Who knew these fancy things existed?! And at good prices too (they can range from around $3.00-30)! Most lamp kits contain the part of the lamp you screw the bulb onto and the chord.
- A drill. I definitely didn't buy my own, I just used my handy-man dads.
- Fabric glue. For putting the finishing touches on your lamp shade.
- Light bulb. Need I explain?
What You'll Need To Do:
- Remove the spout from the beverage dispenser, but leave the small rubber lining on the jar. This will keep the glass from possibly cutting the cord.
- Run the cord from the lamp kit through the hole where the spout was, and out the top of the dispenser.
- Drill a hole in the lid of the dispenser. If I'm being completely honest, I had my dad to this part for me... Thanks dad!
- Run the cord through the hole you (or a helper) just drilled in the lid, and attach the rest of the lamp kit to the lid, using the directions that will come with the lamp kit.
- Fill the jar with whatever you've bought to fill it, in my case my lemons! (Which *side note* were scented and I seriously couldn't stop smelling them).
- Open your lamp kit and peal the outside off to reveal the adhesive.
- Use the paper you just pealed off the shade and use it trace onto the fabric the exact size you'll need. This part is very important; I have never been one for reading directions (ironic because I'm writing directions right now) and I didn't realize I was supposed to cut the fabric before sticking to to my adhesive lamp. I just thought I'd cut off the extra, after I stuck it on, and wound up making way more work for myself than I needed. If you're not using edging or trim on your lampshade cut about one inch larger on all sides of the fabric so you can fold it inside the shade.
- Lay the fabric flat, and roll your shade over it. The fabric should cling to the lampshade's adhesive.
- Using your fabric glue, fold in the edges, and glue them to the inside of the shade.
- Put the shade on the lamp, insert your bulb, and viola! Your DIY lamp is complete!


Buying What You Need:
- Click to see the beverage dispenser I used!
- Here's where you can find scented lemons!
- Get your self-adhesive lampshade for only $4.99 now!
- Here's the lamp kit I used!
- You can pick up your fabric glue, fabric and standard light bulb craft store!

 RSS Feed
